|
Switch A can be positioned for a Kawasaki original stator or an aftermarket stator (which advances the timing throughout the RPM range). Switch B can be positioned for standard timing or for more retarded (delayed) timing for better power at high RPM. HOW TO ACCESS THE SWITCH: Just remove the boxes screws with a small Phillips screwdriver. Once the box lid is removed you can see the switches. You can just use your fingernail or a small screwdriver to manipulate the switches. Once you settle on switch settings then use silicone sealant to seal the lid so the box is waterproof.  But first just plug the CDI into
the CDI connectors which
should be the same. 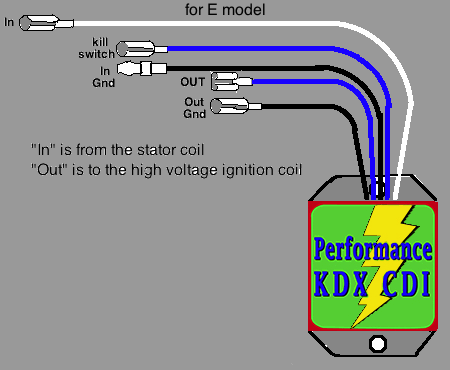  DETERMINING BEST SWITCH
A SETTING: First set the switch to match your stator coil. Ride the bike to test its mid range power. Then stop and throw the switch to the opposite position and go riding. If you have a standard Kawasaki stator coil but the bike likes the switch thrown to the right just leave it there. Maybe the stator coil isn't standard or the stator coil plate was previously turned clockwise which advanced the ignition and this setting for non-standard coils corrected that advance. Don't rev the engine out during this portion of testing because the switch A also affects high RPM tuning which you will correct for when you pick the right setting for switch B. 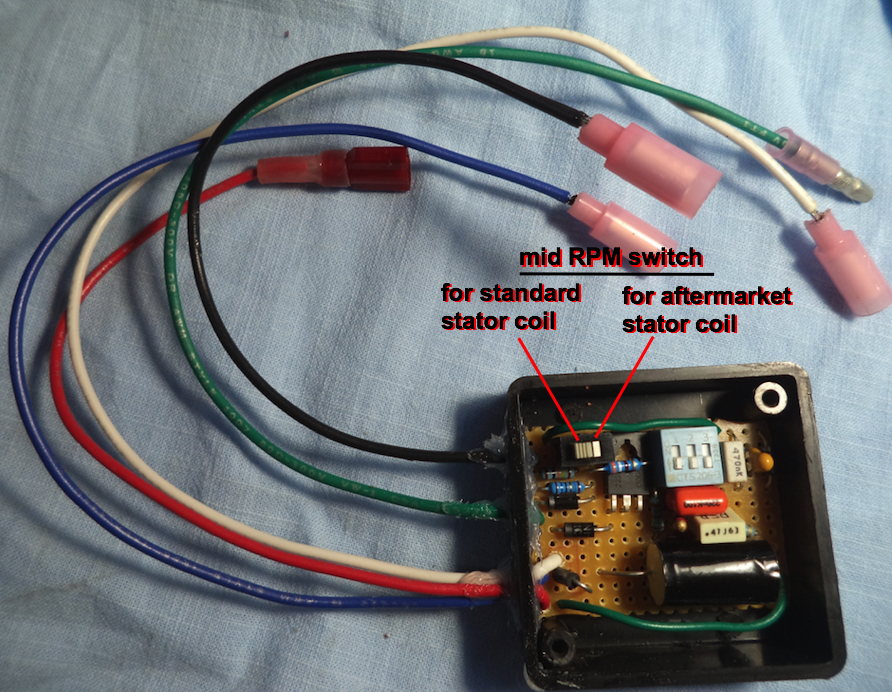 IDLE EFFECTS It's possible that switch A also affects idle, so if the engine tends to kickback when kickstarting then the stator plate needs to be turned CCW. And if idle is too weak then turn the stator coil plate CW. DETERMINING BEST SWITCH B SETTING: With all the three switched to the low position the high RPM timing is standard, the same as stock. The more of these switches that are set in the high position, the more retarded the high RPM timing will be. I think most KDX's will like the 2nd switch high, or the 1st and 2nd switch high. The retarding effect of the 1st switch is half that of what the 2nd and 3rd switches can do. Its a nice option for fine tuning. The drawing on the right shows the 6 different tuning settings available and the switch lever positions for each.  TESTING: The best way to test is by having two markers along a road and then time how long it takes to reach the second one. Do this wth a stopwatch. Pass the 1st marker at the same speed each time. This is also the best method for selecting the needle position and the size of the main jet, which you can test for after you select the best switch positions. People have been under a mass delusion that they can select a main jet by the color of their spark plug and/or the width of the carbon band at the bottom of the plugs ceramic. Both of those methods are disproved on this page. PS - these pictures were taken before I sealed it up with silicone sealant (all except the switches). After you select the best switch positions you can put silicone sealant over the switches lightly to make them waterproof. I think it's overkill but everyone is so paranoid after CV-19, the most over-hyped pandemic in the history of mankind which only killed 1 in every 1000 people. |